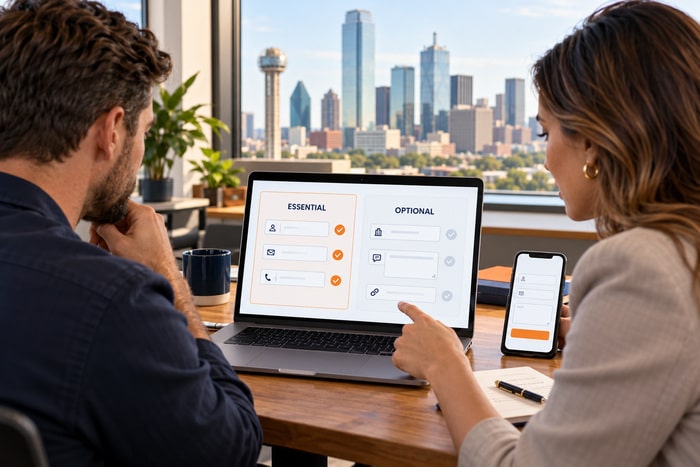
Yes—your website should tell customers how to prepare before an appointment, consultation, estimate, or service visit. A short checklist can reduce delays, prevent missed expectations, improve safety, and help your team spend more time solving the customer’s problem instead of collecting information that could have been ready beforehand.
Booking the appointment is not the end of the website’s job. The customer may still need to: Gather photos or documents. Confirm an address or access code. Clear the work area. Secure pets. Identify the decision-maker. Prepare measurements or account information. Understand cancellation rules. Know how long the visit may take.
When those instructions are missing, the appointment can begin with confusion. The technician cannot reach the equipment. The client does not have the required paperwork. The person who can approve the work is unavailable. A virtual consultation starts without the requested files. A useful website helps the customer arrive ready.
Why Pre-Appointment Instructions Matter
Preparation improves both the customer experience and the company’s operations.
Customers feel less uncertain
People often wonder whether they are supposed to bring anything, move anything, or make a decision during the visit. Clear instructions remove guesswork.
Your team can start faster
If the customer has already gathered the model number, insurance information, photos, measurements, account access, or project goals, the appointment can focus on diagnosis and options.
Estimates can be more accurate
Better information helps the team understand scope. A contractor who receives clear photos and access details can prepare differently than one who arrives with no context.
Avoidable rescheduling decreases
Some appointments cannot proceed without an adult decision-maker, property access, signed authorization, power, water, a payment method, or required records. Explaining those conditions early can prevent a wasted trip.
The business appears organized
Preparation instructions show that the company understands the customer journey beyond the first click.
What Should a Pre-Appointment Checklist Include?
The right checklist depends on the service, but most businesses can organize the information into seven categories.
1. What the customer should gather
List the information or materials needed before the appointment.
Examples include: Photos or videos of the problem. Product model and serial numbers. Previous estimates or inspection reports. Insurance or warranty information. Project measurements. Inspiration photos. Existing website, hosting, or domain access. Medical or intake forms, where appropriate. A list of questions or goals.
Explain how the customer should send the information and which file types are accepted.
2. Who should attend
Some decisions require more than one person. Tell customers when the following people should be present: Property owner, Spouse or co-owner, Authorized company, Representative, Person responsible for payment, Technical contact, Tenant or property manager, & Parent or guardian, when appropriate. Avoid surprising the customer at the appointment with an approval requirement that could have been disclosed beforehand.
3. How to prepare the location
For an on-site visit, include practical access instructions.
The customer may need to:
- Move vehicles
- Unlock gates
- Provide a gate code
- Clear items around equipment
- Make an attic, crawlspace, panel, or utility area accessible
- Reserve parking
- Notify building security
- Secure pets
- Identify fragile or restricted areas
- Make sure utilities are available for testing
Keep the instructions proportional. Customers should not perform unsafe work or dismantle equipment.
4. How long to reserve
Give a reasonable time range and state what can change it. For example: “Most consultations take 30 to 45 minutes.” “Please reserve up to two hours for the initial site assessment.” “The virtual review normally takes one hour after all files are received.” If arrival windows are used, explain the difference between the arrival window and the time required for the actual appointment.
5. What the appointment will cover
Explain the purpose of the visit. Customers should know whether the appointment includes: Diagnosis, Measurements, A written estimate, Product selection, Design recommendations, Treatment or repair, A project kickoff, Account setup, Training, & A follow-up recommendation. If the first visit is assessment-only, say so. Do not let customers assume the full repair or project will be completed during an appointment designed only to evaluate the situation.
6. Payment and approval expectations
Tell customers what may be due and which decisions may be requested. Include relevant details such as: Consultation fee, Service-call fee, Deposit, Accepted payment methods, Financing application, Cancellation charge, Authorization required before additional work, & Whether estimates are provided during or after the visit. This supports the pricing information elsewhere on the website without repeating every detail.
7. Rescheduling and contact instructions
Make it easy to report a change. Provide: Phone number, Email or scheduling link, Minimum notice requested, Instructions for running late, Weather policy, What happens if the technician cannot enter, & How to update the address or access code. A customer should not need to search the entire website to change an appointment.
Put Instructions in More Than One Place
A preparation page is helpful, but customers may not remember to find it. Repeat the most important instructions in: Service page, Appointment booking screen, Confirmation page, Confirmation email, Reminder email or text, Calendar invitation, Quote-request follow-up, & Customer portal. Use the same wording across channels. Conflicting instructions create more confusion than no instructions.
Match the Checklist to the Service
One generic checklist rarely fits every appointment type.
Home-service appointment
Useful preparation may include:
- Confirm the service address
- Describe the problem and when it began
- Send photos if safe
- Clear access to the work area
- Secure pets
- Identify parking or gate restrictions
- Make sure an authorized adult is present
- Locate relevant warranty documents
Website consultation
Ask the client to prepare:
- Current website address
- Primary services
- Target cities or service area
- Examples of websites they like
- Logo and brand files
- Current domain and hosting information
- Required features
- Project goals
- Names of decision-makers
- Questions about content, SEO, support, and timeline
Do not request passwords through ordinary email. Provide a secure method when credentials are needed.
Professional consultation
Depending on the field, preparation might include:
- Relevant records
- Identification
- Timeline of events
- List of questions
- Names of involved parties
- Existing agreements
- Completed intake form
- Decision deadline
Avoid collecting sensitive information through an unsecured form. Tell customers which records are needed and how to provide them safely.
Virtual appointment
Include:
- Meeting link
- Time zone
- Device requirements
- Camera or microphone expectations
- Files to upload
- Quiet location recommendation
- Backup phone number
- Instructions if the link fails
Test the meeting link before sending automated reminders.
Keep the Checklist Short and Prioritized
A long wall of instructions can feel like homework.
Divide the content into three levels:
Required
Items without which the appointment cannot proceed:
- Access to the property
- Authorized adult present
- Required document
- Completed intake form
- Deposit or payment
Helpful
Items that improve the visit:
- Photos
- Measurements
- Product details
- Examples
- Questions
Do not do
Safety and privacy boundaries:
- Do not open electrical panels
- Do not climb onto a roof
- Do not move dangerous equipment
- Do not email passwords
- Do not send sensitive records through an unapproved channel
This structure lets customers recognize priorities quickly.
Use Plain Language and Specific Verbs
“Prepare for your appointment” is a label, not an instruction. Use verbs that tell the customer what action to take: Upload, Bring, Measure, Photograph, Unlock, Move, Confirm, Complete, Reserve, & Call.
Compare:
- Vague: “Please have all relevant information ready.”
- Specific: “Please have the model number, warranty paperwork, and two photos of the equipment ready.”
- Vague: “Ensure access.”
- Specific: “Unlock the side gate and clear three feet around the outdoor unit.”
Specific instructions are easier to follow and easier for staff to enforce consistently.
Explain Why the Customer Is Being Asked
Customers are more likely to complete a request when they understand its purpose. For example: “Photos help us bring the right diagnostic tools.” “Having all decision-makers present reduces delays in approving the design.” “Clearing the area helps the technician inspect the equipment safely.” “Sending the content before the meeting gives us time to review it.” Keep the explanation brief and truthful.
Protect Privacy and Safety
Preparation should never encourage unsafe activity or unnecessary data collection. Review every request: Is this information required at this stage? Does the customer know why it is needed? Is the collection method secure enough? Who will have access? How long will the information be kept? Could the instruction expose the customer to physical risk?
Do not ask customers to perform technical work merely to save appointment time.
Connect the Checklist to Internal Operations
The public instructions should match what the team actually needs. Ask field staff, estimators, salespeople, and support staff: What are customers most often missing? What causes appointments to run late? Which access problems happen repeatedly? Which questions are answered on every call? Which details affect the estimate? What should never be requested by email? Turn recurring problems into clear website guidance. Then make sure staff members reference the same checklist when booking by phone.
Measure Whether the Checklist Works
Do not assume the page is useful simply because it exists. Track operational signals such as: Fewer rescheduled appointments. Fewer inaccessible work areas. More complete intake forms. Higher percentage of required documents received. Shorter check-in time. Fewer clarification calls. Better on-time completion. Fewer appointment-related complaints. Ask employees which instructions customers follow and which ones remain unclear.
A 15-Minute Preparation Audit
Review your most common appointment from the customer’s perspective.
- Identify the five items that make the appointment successful.
- Mark which items are truly required.
- Add a short reason for each unusual request.
- Confirm the instructions avoid unsafe work.
- Provide a secure path for sensitive information.
- State who should attend.
- Explain how long to reserve.
- Clarify what the appointment includes.
- Add rescheduling and late-arrival instructions.
- Repeat the essentials in the confirmation message.
Then ask a person outside the business to read the checklist. Can they tell exactly what to do?
The Appointment Starts Before Your Team Arrives
A well-prepared customer is not created by chance. The website, confirmation page, email, text reminder, and staff should all provide the same next steps. Start with the essentials: What to gather, Who should attend, How to provide access, How long to reserve, What will happen, What may be due, & How to reschedule. Clear preparation instructions save time, reduce uncertainty, and help the business deliver a more professional experience.
DFW Website Designers can help organize service pages, booking paths, confirmation content, and customer instructions around the questions people ask before they do business with you. Call 817-247-6003 to discuss a clearer customer journey.